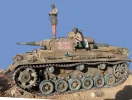
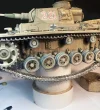
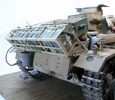
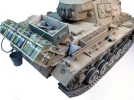
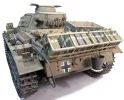
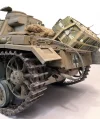
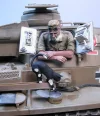
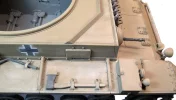
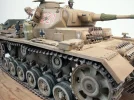
In the desert furnace...PANZER III Ausf.J Das Werk 1/16

Gérard Deygas

🇺🇳 Niet Nederlandstalig
I open this new feed with one of my last subjects at 1/16
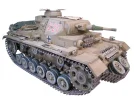
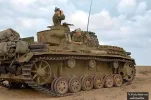
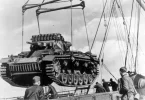
Declined in several versions with moderately effective improvements, the Panzer III will be qualified as a medium tank by the Wehrmacht. Widely used on the Eastern Front and in North Africa, soon exceeded it will be replaced advantageously by the Panzer IV. It will subsequently serve as an armoured escort to support the infantry rather than facing armoured forces.

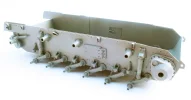
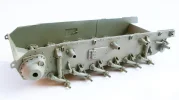
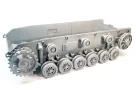
The kit: After the Stug III from the same manufacturer, I let myself be tempted by the Panzer III Ausf. J. It is no longer necessary to praise DAS Werk as much for the 1/16th as for the 1/35... The quality is there and we are never disappointed when we open the box! Based on the same chassis, we find all the ingredients faithful to the brand. Significant packaging, an impressive number of parts grouped into twenty-one plastic clusters, an illustrated assembly plan with six color profiles, a photoetched, a decal board, a translucent plastic board to restore the glasses of the episcopes, of lighthouses, two turned aluminum cannons etc... The chassis. The suspension arms in place, they will remain articulated allowing a perfect adaptation on a dio to difficult terrain!. Blank test of the undercarriage components, support rollers, rollers, pulley and sprocket...

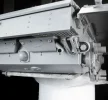
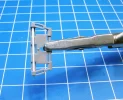
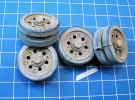
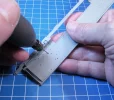
If nothing goes wrong, we’ll remove everything because these parts will be painted separately! A small remark, the molding of the supporting rollers could have been simplified thus reducing the number of parts... Indeed, the assembly of the two half parts of the rubber reveals a rather unsightly joint to fix! You should spread liquid glue on both sides to avoid using sealant. After drying, the excess glue will be removed with a half-round file; the finish will be done with fine abrasive paper. Finally, with the supporting rollers (the rollers will be treated in the same way), “break” the overly protruding rubber edge with a flat file.

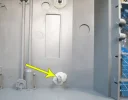
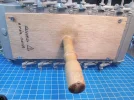
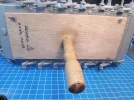
I am keeping here the same attachment as for the Stug III, a plywood board, an effective system to hold the kit during all the assembly and painting phases. For this, the frame is drilled and four nuts are glued inside, two at the front and two at the back of the body. Set the location of the holes beforehand to avoid crossing a torsion bar. In order to secure the bonding, I reinforced the nuts with Magic Sculpt. Another putty will also do the trick.
A 5 mm thick board will be screwed into the frame (6 mm screws) on it, and a wooden handle will be attached to complete this adaptation (drop of a wooden curtain rod, handle of a brush, etc.).
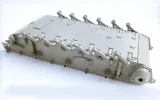
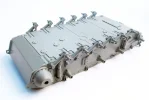
Photo-1.webpPhoto-2.webpPhoto-3.webpPhoto-4.webpphoto-5.webpPhoto-6.webpPhoto-7.webpPhoto-8.webpPz-III-soleil-ombres.webp
 
Laatst bewerkt door een moderator:
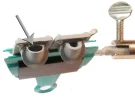
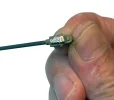
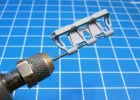
The axes for passing sling hook, B27 parts, must be improved; indeed, the end piece that positions itself in the hook is actually conical. A hole of 0.35 mm must be drilled for the passage of a pin that will keep the axis in place. A chain will ensure the whole, thus preventing the axis from falling due to the vibrations caused by the movement of the armored vehicle. I placed the hook on an eraser to prevent it from moving when drilling! On the right is the copper wire pin. The loop is formed on a sewing needle. The chain comes from Green Stuff Worlds.
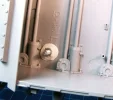
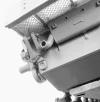
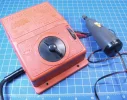
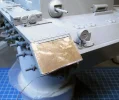
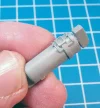
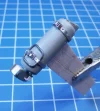
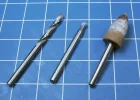
The plastic on the exhaust pipe outlets is too thick and not deep enough, so the holes were enlarged and dug using a ball mill mounted on a mini drill. On this subject, I use a train transformer from the brand Jouef, which serves as my drive!
During fairs or model train exhibitions, you can find these little transfos, which are more commonly used nowadays, sold for a trivial amount of money!
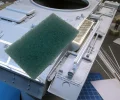
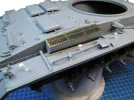
For better adhesion, the photo-etched grids at the back of the crate are brushed with a Scotchbritt scouring pad and then glued with a cyanoacrylate gel glue.
Photo n° 14: As for the exhaust outlets, the air intake openings (parts G2-14) on the transmission section will be enlarged. Perform this operation before gluing the parts on the top plate of the crate.

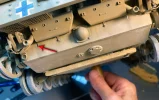
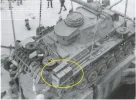
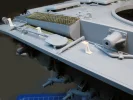
The replacement track element support bar, part F2-12, is much too thick and poorly reproduced in shape; we will replace it with Evergreen profile.
To be sure of its location, I assembled some chenille runners then positioned on the back a piece of double-sided tape to keep the element in place on the body of the Stug.... All I had left was to present and stick the bar. A bar is welded to the front plate of the hull to install crawler pads, which can be used to increase shielding or as a simple precaution not to run out of pads!

Photo-10.webpPhoto-11.webpPhoto-12.webpPhoto-13.webpPhoto-14.webpPhoto-15.webpPhoto-16--bis.webp
 
Laatst bewerkt door een moderator:
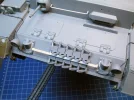
How will you fix the fact that the suspension is over 2 cm too high when released from the jig?
If you builg the Stug and/or this kit just following the plans it will end up way too high.
I cut the bars, lowered the hull to the correct hight and reglued the bars
 
On the lid of the boxe (F2-27), extend the hinges with Evergreen profile. Add a half-loop in the latch for the passage of the padlock.
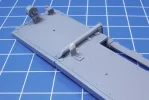
Photo no.: During the manufacturing of the molds, some holes for positioning the tools in the on-board set were not pre-drilled; this oversight is indicated during steps 18-1 and 18-2 of the assembly plan by a strange symbol, not very clear... I would have preferred to see a more explicit forest/wick symbol appear. A side plan would have been preferable! These holes will be drilled through the inside of the mudguard, 1 mm drill bit.
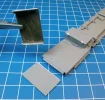
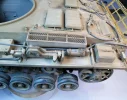
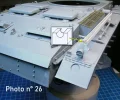
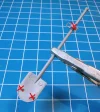
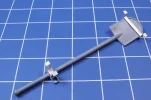
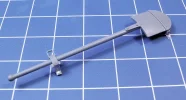
The supports of the shovel, remove them to replace them with aluminum foil. The fastening bolts are cut from hexagonal punch-die plastic card. Having raised the shovel by its new fastenings will result in the end stop of the handle being modified. The dough at square will be lengthened with a piece of Evergreen profile. Its end is rounded. For the antenna duct, the manufacturer went to the simplest option; once again, the parts are too thick and the whole system does not look at all like the equipment mounted on the PZ III ausf. J... We keep the dimensions, but we redo everything with Evergreen profile. Then, we can restore/reproduce a chute corresponding to the actual piece that was made of wood. The end of the antenna mast when it is in its housing is placed on a wooden abutment for support. It is made of balsa according to the sketch included in photo no

Supports-et-goulotte-3.webpSupports-et-goulotte-2.webpPhoto-25.webpphoto-26.webpPhoto-24.webpPhoto-20.webpPhoto-23.webpPhoto-22.webpPhoto-21.webpPhoto-18.webp
 
Laatst bewerkt door een moderator:
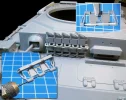
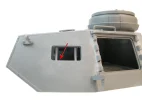
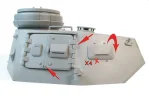
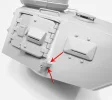
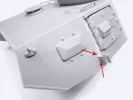
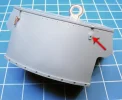
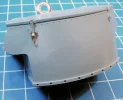
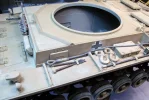
As with some parts of the kit, the turret needs some modifications and improvements but what would we do if a model was too perfect, apart from assembling! The orientation of the side panel is incorrect, the front panel goes up too much! To correct this defect, the four conical bolts must first be carefully retrieved using a flat-tipped X-Acto blade, as they will be reused. Little tip: to avoid losing the bolt, moisten the end of the blade with a bit of saliva; the bolt will remain "stuck on it"! Using a flat file, material will be removed from the inside of the flaps (parts B2-51 and B2-52) in order to pivot them downwards in their housing and thus give them the correct inclination.
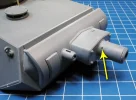
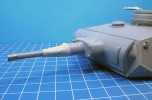
The hinges of the G2-15 and G2-16 hatches, once glued, leave an unsightly void that will be filled with Sintofer sealant, a sealant available in large areas intended for DIY. The lugs on the bottom of the hatches are drilled, drilling 0.5 mm. The conical bolts will be replaced after gluing the flaps. Finally, add the welds on the trapdoor stops, Prince August putty. The conical bolts too large at the base of the barrel will be removed and replaced by parts taken from a Model Kasten pouch, parts that are closer to reality.

Photo-27.webpPhoto-27-Bis.webpPhoto-29-aplatie.webpPhoto-30.webpPhoto-31.webpPhoto-32.webp
 
Laatst bewerkt door een moderator:
To prevent sand and dust from entering the barrel, it is protected by a sleeve and a hood made of canvas. The sleeve is shaped in Magic Sculpt and the cap is cut from a sheet of tin, 7 mm wide band. The machine guns could also be covered in the same way. Many photos show this configuration.

photo-33.webp

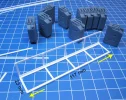
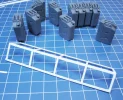
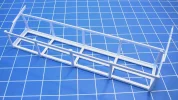
For the frame design, I had to use jerrycans, which allowed me to determine its dimensions. I chose the ones offered by AFV Modeler. I don’t regret my order because they are superb. The Evergreen flat frame is assembled with liquid glue from Revell. An excess of voluntary glue will simulate the numerous welds. A blank assembly on the crate will make it possible to check that nothing is wrong... To keep it in place, it is pointed using three points of cyanoacrylate gel glue. At that time, we will be able to measure and create the reinforcements that will weld on the sides of the crate. The frame is finished, the return rails are in place! The fragile frame is carefully stored while waiting for its painting.

photo-34.webpPhoto-35.webpphoto-36.webpphoto-37.webpPhoto-38.webp
 
Laatst bewerkt door een moderator:
Great looking frame 👍👍
 
The latches on the trunk door do not at all resemble the latches found on most German vehicles. Everything needs to be redone, starting by removing the molded support at the back of the trunk. The new latches are made of copper wire flattened with a hammer, aluminum scraps for the support and Evegreen rods. The presentation of the antenna base is improved by adding half-round pewter foil.
The folding part of the right front fender is slightly bent. After several attempts to soften the plastic without result – boiling water, heat gun, pyrography - I turned towards a falling brass sheet. First, the part to be replaced must be removed with a saw, while keeping the hinge intact. Carefully collect the side sheets to reattach them to the new. For its deformation, the sheet is held in a miniature press. To reinforce the assembly, two thin Evergreen strips are glued on the inside. A thin strip of tin at the end of the sheet will complete this modification.
The fire extinguisher after modifications. The new straps are made of tin sheet, the loops of tin wire.

Photo-39.webpPhoto-40.webpPhoto-41.webpPhoto-42.webpPhoto-43.webpPhoto-44.webpPhoto-45.webpExtincteur-2.webp
 
Laatst bewerkt door een moderator:
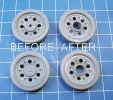
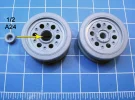
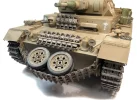
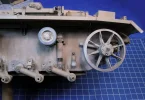
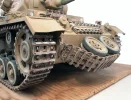
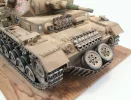
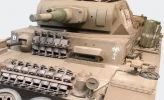
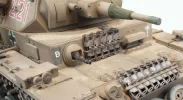
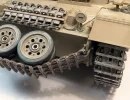
I decided to install my two spare rollers at the front of the panzer, trapped in the track, an installation often seen on the ground... As they are proposed, the spare rollers must be positioned on their support; the circular plate bolted onto the roller must therefore disappear! The tools that allowed me to carry out this transformation: a 3 mm drill bit to drill inside the two parts that make up the pebble, then the ball mill followed by the conical grinding wheel will be used to reach a diameter of 7 mm. I sacrificed a reducer that comes to be positioned on the axis of the suspension arms, parts A24. Cut the piece in half using a saw. This will give you two reducers, which you can glue inside the hole in each of the rollers, slightly set back +or – 1 mm. You will need to expose the holes for fixing the cabochon. Finally, a washer taken will complete this modification.

Photo-47.webpPhoto-47-bis.webpPhoto-48.webpPhoto-49.webpPhoto-50.webpPhoto-62.webp
 
Laatst bewerkt door een moderator:
Up until now, I never realised how they attached those spare tracks to the hull front 🙂
 
I agree, they even work as big ones, you can (un)screw them to open or close the D-shackle

 
The exhaust protection sheet is missing, the holes for its attachment will be plugged with pieces of plastic card.
The outer pads of the spare track section are improved by drilling holes for the axle passage. The photos reveal the welds, Prince August Sealant, made around the air intake openings.
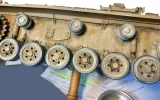
Curious reaction: immediately after the application of sand dust onto the rollers of the running gear, a pigment copiously diluted with F gasoline, some cracked, fortunately not all! Probably a chemical reaction due to the plastic containing marbles from different origins??? I hope you won’t encounter this problem with your kit because there’s work to take all that back! Plastic card, liquid glue and Sintofer sealant will be needed to restore the pebbles to their original appearance!
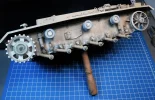
So as not to struggle during the installation of the tracks and free my hands, I arranged the kit, with the support plate still in place, on two large rolls of adhesive. A drop of PVC with a diameter of 80 or 100 mm will also do the trick. Thus, the holding handle is inside this improvised device and the wooden plate rests on the cylinder. Obviously, the caterpillars do not escape dust.

Arriere-caisseA.webpAxe-patins-1.webpAxe-patins-2.webpAvant-de-caisse.webpGalets-fissurés.webpPhoto-8.webpPhoto-54-bis.webp
 
Laatst bewerkt door een moderator:
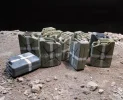
The body and its jerrycans. In the armored columns, this "precious fuel" was shared. If some tanks only carried fuel, others ensured the transport of water. Ten jerrycans are stored on the armored vehicle. It was also found on the mudguards and even on the turret roof. Water is sorely lacking, shortages are frequent, tanker trucks sometimes cover more than 1,500 km to supply the fighting units! One of the towing cables is ready just in case!
Without exaggeration, traces of fresh rust appear on the exhaust pipes. The base of the pots is painted with a mixture of dark brown Revell 84 + brown red grain Stil from Rembrandt. For discreet rust, the Panzer comes out of the factory, very diluted pigment with F gasoline is applied. The welds connecting the frame to the body are made with Prince August putty. Painted Humbrol 11 silver, they will be covered with a Humbrol 29 clay + black oxide Rembrandt juice. The pins holding the axes of the hooks are clearly visible.

Photo-53.bis.webpPhoto-53.webpPhoto-54.webpPhoto-55-bis.webpPhoto-56.webp
 
Laatst bewerkt door een moderator:
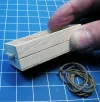
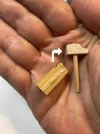
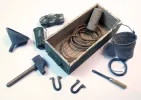
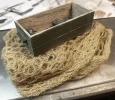
To store some tools in addition to the large turret stowage chest, a wooden crate is made of balsa. It is painted Humbrol 30 green. Tools such as the hammer and the screwdriver are made of balsa wood for the handles, and resin part for the hammer and an evergreen profile for the screwdriver. The mask boxes are originally from an old Verlinden reference. On the rear armour plate, the crew stored a camouflage net. Having failed to find a net with square meshes, types of meshes used at the time, I turned to a potato net. After covering it with a sand base color, I diluted some Humbrol 29 clay with essence F in an aluminum cup and then dipped the net to make it absorb this shade. After drying, a sand-based pigment wash will finalize this painting step. The bucket comes from AFV Modeler. The handle is made of copper wire shaped on the handle of a marker. The rope is made of ecru rigging wire, which can be found in stores specializing in parts and accessories for naval modeling. It is tinted with Humbrol 29, well diluted earth. The funnel is made of plastic card and round Evergreen.

Coffre-B.webpMarteau.webpOutils-2.webpCoffre-A.webp
 
Laatst bewerkt door een moderator:
PAINTING, PATINA AND DECORATION
Convinced that at least two pots of Humbrol 93 sand would be necessary to paint the model, given its surface, I was pleasantly surprised to use only one! The shade has good hiding power with a 50% white spirit blend. After a few hours of drying, the set received a layer of matte varnish in spray from the brand Nuance which can be found in Cultura stores. For some, this information will be welcome because Cultura, there are everywhere in the Europe! A new drying period of 24 hours will be followed by the application of the usual wash, here a mixture of Rembrandt black oxide, available at Cultura, and Revell 82 Earth. If some parts appear too dark, they can be removed with a flat brush soaked in white spirit to lighten them.
The ubiquitous sand dust on the armored vehicle will be obtained from light sand pigment abundantly diluted with F-gasoline. The brand new Panzer, because it was recently in Libya, will not show signs of wear, chips, or scratches, and will suffer various damages. This was not uncommon and it was part of the realities on the ground! After their installation, the decals will be covered with sand pigment without exaggeration... Applied dry using a flat brush. Like the inside of the turret, the inside of all the hatches is white Revell 5. The same wash is applied.

Peint-1.webpPeint-2.webpPeint-3.webpPeint-4.webpPeint-5.webpPeint-6.webp
 
Laatst bewerkt door een moderator:
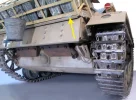
Many photos show this configuration: two spare rollers stored in a track element installed at the front of the Panzer III. Without them, I made the two shackles that hold the track at the front of the armored vehicle. The shackle is made of tin wire formed on a toothpick, the axis is in the round Evergreen.

Galets-1.webpGalets-2.webpGalets-3.webpGalets-4.webp
 
Laatst bewerkt door een moderator:
The jerrycans, a very beautiful 3D print, come from AFV Modeller, ref.16149. In order to make it easier for me to paint them, I fixed them on a feather plate and double-sided cardboard, which allows me to easily turn around with my airbrush and paint several at the same time! Panzergrau at the base, they are painted in sand for the desert, here Revell 16 mat. Of the ten who will join the rear of the Panzer III, two will keep their original color. To distinguish petrol jerrycans from those Jerrycans water, a white cross is applied on each side. Masking tape is used for this painting phase; the white is painted with a flat brush made of matt white Revell 5, with strips 3 mm wide. If most were repainted in a color similar to a sand yellow "Sahara Desert", there were necessarily variations in the colors, it depended on the origin of the paint, the dilution. On site, the maintenance team used what they had at hand! Very often handled, transported by truck, these jerrycans are not spared from impacts, scratches, blows etc... To reproduce these marks, we will need the shade Humbrol 67 gray Panzer and the bristle brush, very hard if you have any! Soak the brush and brush all parts in contact with the floor or other objects, handles, sides. We finish by applying a pigment for the dust.
Other assemblies were made to transport as many jerrycans as possible, wherever there was room for storing them... Mudguard and on the turret roof

Jerrycans-1.webpJerrycans-3.webpJerycans-2.webpPanzer III D.A.K.22.webpPanzer III D.A.K.17.webpPanzer III D.A.K.55.webp
 
Laatst bewerkt door een moderator:
THE FIGURINES, ORIGINS AND PAINTING
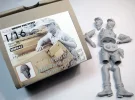
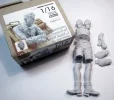
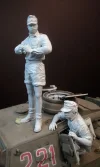
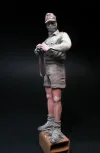
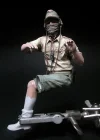
Selected from the range of the Korean manufacturer Sol Models, the three figurines composing part of the Pz III crew are molded in resin in a light gray color revealing a very beautiful engraving as well as quality molding. The different parts, arms and legs, fit together perfectly without any touch-up. The discrete joint planes are removed with a soft round file. The attitudes proposed, particularly suitable for radio even though he left his post, fully validate my choice for these characters. A small blank test allows you to check the positioning of each figurine in the designated locations. The cat in 3D printing, high quality print, is from the MICK 3D Print range. This young French brand is rapidly expanding in many scales for the pleasure of all.
Except in special cases, I always paint the heads separately. Usually, I glue the head onto a resin rod. A plastic cluster drop can also do the trick. All the colors used are diluted with White Spirit. They are covered with a matte white primer. If I preferred Revell white 5, it’s because its covering power is significantly higher than the shade Humbrol 34. A wide variety of uniform colors existed in tropical outfits, ranging from a dark green to a pale green. Dark yellow, light etc... wear of outfits under a scorching sun, permanent sand dust and washes that wash away the colors are also to be taken into consideration. I referred to the excellent album Afrikakorps published by Histoire et Collections. The 144 pages offer a rich iconography on German tropical outfits. Equipment and materials complete this magnificent book

The commander of the tank. Tropical cap Humbrol 93 sand cap with a tip of white Revell 5. The shorts, mix of Humbrol 29 Earth + Revell 6 matte black. The shirt, Humbrol 187 sand. A wash based on Revell 6 black + Humbrol 29 earth is applied the next day to the outline of the pockets, belt, collar, shoulder straps, pockets etc... Socks, blend of Humbrol 29 + Rembrandt brown grain Stil. Brodequins, part green Humbrol 151 fabric with a touch of matte black. Leather part, brown grain Rembrandt Stil + Revell 6 + Humbrol 29. After a few hours of drying, they will be covered with a sand pigment juice. Protective goggles Humbrol 29 + Revell 6 black. Revell 36 red glass coated with glossy varnish, Humbrol 11 aluminum contours. Belt in Humbrol 84 spun cotton with a touch of black 6. For the flesh shade, I use only two paint references: Rembrandt brown grain Stil and Revell 5 white. A little touch of red will be added to paint the lower lip, that’s all!
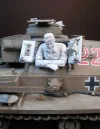
The radio. The shirt, a mix of light yellow Revell SM314 + Humbrol 29 (90/10). Short Humbrol 30 green with a tip of Humbrol 29 + a tip of white 5. Scarf Revell 84 brown. Humbrol 172 loco green cap + Humbrol 151 interior green. The headphone and laryngophone wires, mix of Revell 84 + Revell 36 red. Since the legs of the radio were not visible once in place in the turret, only the right leg was glued to ensure the figurine’s support during the painting phase.
The outfitter. Humbrol shirt 84. Revell shorts 86 dark earth. Blue Humbrol scarf 89. Belt, same as tank commander. Revell 86 earth goggles + Revell 6 black coated with glossy varnish. Humbrol 187 sand strap + Humbrol 39. Black Rembrandt oxide gun case covered with satin varnish. The hair, Revell SM314 yellow, matte black wash 6 + Humbrol 29, is then lightened by brushing SM314 with a hint of white. You will notice that the three characters have traces of perspiration under their armpits, a very real detail to reproduce! I reproduced this effect with a mix of Revell 86 + Revell 6 black. The parts closest to the armpits will be covered with a glossy varnish. Thus, a halo will remain towards the most distant part. Small details that seem real!!!
The cat. The only little “touch of humanity” in this war. Its black and white hair: Revell 6 matte black, Revell 5 white. The cat’s truffle, still slightly damp, a drop of satin varnish should be applied to this area. Helmut gave him something to drink from a box that contained canned meat. Box made in the body of a marker, the lid is cut from 3/10 plastic card, all covered with an aluminum shade Revell.

Fig-1.webpFig-2.webpFig-3.webpFig-4.webpFig-5.webpFig-6.webpFig-8.webpFig-9.webpFig-10.webpFig-11.webp
 
Laatst bewerkt door een moderator:
To avoid the risk of cutting the copper cable too short, even if the manufacturer gives the dimensions; this type of cable does not run on the streets, I used a length of string to route it. After checking that the string fit correctly in its slot, I cut the cable using a wire cutter. Painted in Humbrol 27 gray, it will show traces of dust. All supports and fasteners must be refined. Traces of oil, grease, and dry gasoline are present above the engine. The jerrycan frame seen from above, the color is very different from the one applied to the kit, Revell 16 sand applied with a brush.
The fire extinguisher in place and complete with the label bearing the manufacturer’s mark, decals included in the kit. Various details are clearly visible in this photo: the power cable at the rear of the convoy light, and the towing cable in its housing. The support for the jack is improved by adding a tin foil strap topped with a copper wire loop. The jack is very well understood by DAS WERK. The protective grille on the engine cooling part has taken a hit; it is perforated. The power cable for the convoy fire is made in tin wire.

Photo-77.webpPhoto-78.webpPhoto-79.webp

The cutting pliers, hooks, crowbars... The slightly scratched towing cable loop, Humbrol 67 gray Panzer, due to its frequent use. The Panzer are not equipped with sand filters and the mechanics suffer enormously... The German equipment, poorly prepared for fighting in North Africa, will be put to a severe test!

Photo-80.webp

Close-up of the front of the Panzer III. The palm tree, emblem of the Afrikakorps (decals included in the kit) and the badge of the 21. Panzer Division (freehand painted) are painted on the front armored plate. Our Panzer III belongs to 2./Panzerregiment 5.

Photo-81.webpPhoto-82-bis.webp
 
Laatst bewerkt door een moderator:
The track elements are covered with dust. There is a clear distinction between the two shackles that hold the track portion. Seventeen skids will have to be assembled to support the spare rollers.
Photo no. 83: bird’s eye view of the glacis, with its improvements. The wiring of the Notek headlamp, the warning device, and the improved hooks that hold the folding part of the mudguards. The routing of electrical cables to the headlights. Note the residual sand from the last storm.
The fabric sleeve and the protective cap are painted Humbrol 30 green + Humbrol 93 sand. They are then dusted with the dry sand pigment applied. The two MGs are metallised with 4B graphite pencil.
This view of Helmut from another angle allows us to have access to the antenna base, the crank handle, and the axe, an accessory rarely used. We notice the presence of sand everywhere on the tank. The turret hatch handles were correctly positioned; there was an error in their location, parts G2-61 go up and parts B2-28 go down. In fact, they need to be reversed. Our Chargeur is equipped with the essential protective goggles in North Africa. He too sweats a lot! Smoking brings a touch of realism to the scene.
The antenna is in its chute (this one is made of wood). A funnel, an essential accessory for water transfer, is part of the equipment of this Pz III. It would be good for some manufacturers and craftsmen to offer a whole lot of useful small equipment in 3 D printing, such as shackles for example! For now, on this scale, this type of accessory is not out there. Note the new attachments for the shovel, the electrical cable at the back of the light and the small screw at the end of the chute.

Avant-de-caisse.webpGalcis-1.webpGlacis-2.webpGlacis-3.webpGlacis-4.webpGlacis-5.webpGlacis-6.webp
 
Laatst bewerkt door een moderator:
Terug
Bovenaan